
 Print
Print
|
|
|
Step 2. Upload Audience Data
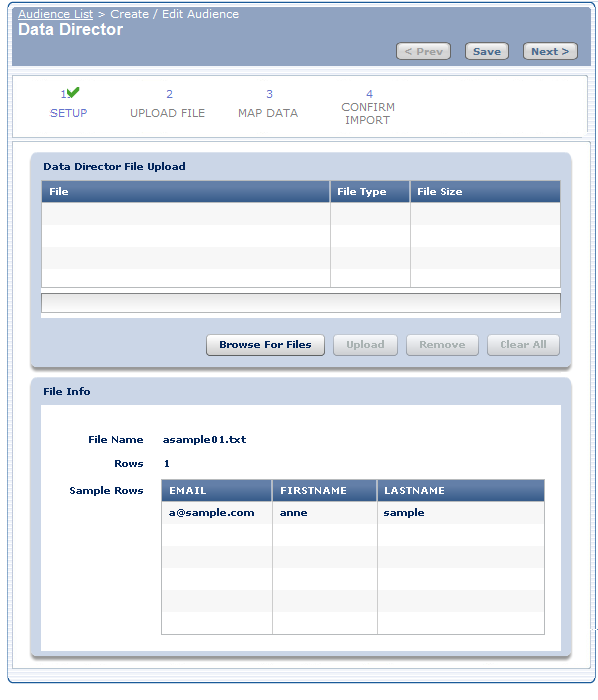
During this step, you upload the data file and preview its contents to ensure it is the correct file to import. The actual import is completed when you confirm the import in Step 4: Confirm the Import.
To upload the data file:
- Prepare the data file.
Your data must be clean prior to uploading it with Data Director. 'Clean' means removing any inaccurate information. For example, some export programs add additional spaces after the field value such as LASTNAME. Remove any spaces that exist after a LASTNAME before uploading the data file. For example, change "Tuckerman " to be "Tuckerman". Failure to upload clean data may adversely affect your Master Database and mailings that are sent.
Ensure that your data file is in tab-delimited format. Data Director does not accept data files in any other format. To save a file in your database program as a tab delimited file, choose the Tab file type when saving/exporting your file from your corporate database.
- Click Browse For Files and select a file to upload.
- Click Upload.
The file is then uploaded to e-Dialog.
Once the upload is complete, you can view a sample of the data file with various file statistics to ensure it is the correct file. When you have ensure that it is the correct file, you can then proceed to the next step. If you see errors in the sample data or if the file is incorrect, click Clear All and then upload the correct file.
Important: Do not leave this page until the upload is complete. Leaving this page prevents the file from properly uploading.
- Click Next.
Upload Times and Sizes
Upload times can vary greatly depending on your Internet connection and the number of rows and columns you are uploading. For this reason, it is recommended that you use a high speed connection for your uploads. As an estimate using a high-speed connection, you should experience upload times of approximately 1 minute per 10,000 names. Also, your results may vary, but it is not recommend that you upload data files that contain more than 200,000 names.
Print