
 Print
Print
|
|
|
Creating a Content Object
You can create a text, HTML, or image content object.
Note: Images are not stored in the Content Library. Instead, the URL that points to the image, along with any properties, is stored.
To create a text or HTML content object:
- Click New.
The editor appears:
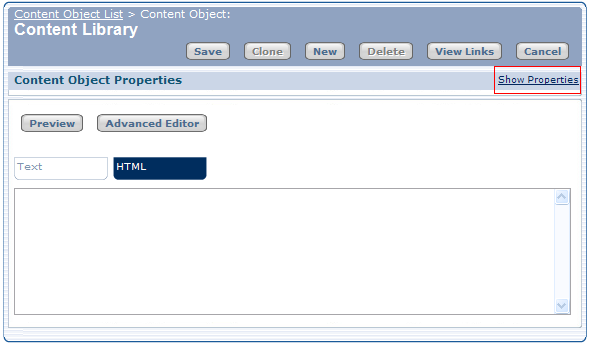
- Click Show Properties.
The Content Object Properties pane appears:
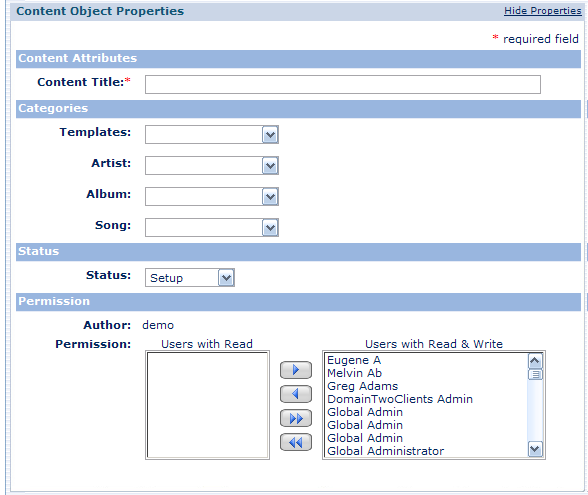
- Enter the content title in the Content Title text box.
- Select the categories to use to organize the content.
- Select the status from the Status drop-down.
- To change a user's permission from read and write to read-only, use the arrows to move the user from the Users with Read & Write column to the Users with Read column.
- Enter or copy HTML or text into the Content Library Editor or Advanced Editor.
- Click Save.
To add an image to the Content Library:
- Click New.
- Click Advanced Editor.
- Click
 .
. - Enter the URL that points to the image.
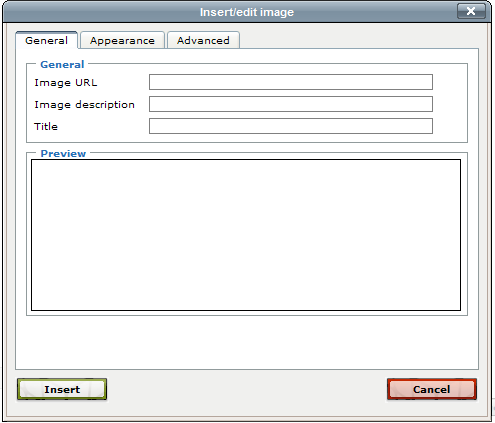
- Enter a description of the image and the image title.
The value you enter as the Title appears in the HTML source as <img title="title you enter". The value you enter as Image description is the alternate text that appears if the image is missing and appears in the HTML source as <img alt="image description".
- (optional) Click the Appearance tab to change the appearance of the image.

- Change the alignment, dimensions,space around, border and style of the image.
- (optional) Specify other properties of the image by clicking the Advanced tab.
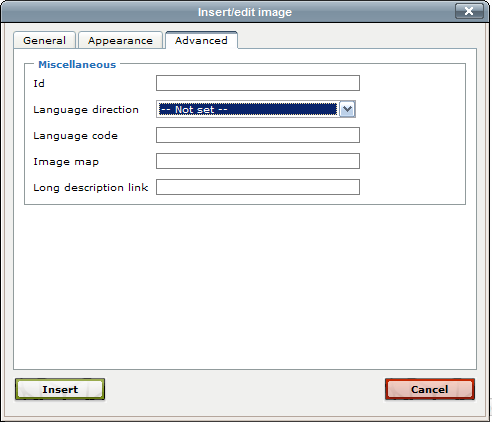
- Specify the image ID, whether the language goes from left to right or right to left, the language code to use, the image map, and a link to the long description of the image.
- Click Insert.
Print