This tutorial procedure assumes that you have already installed Vertica on a cluster of  hosts as described in the Installation Guide.
A host is a computer system with a 32-bit or 64-bit Intel or AMD processor, RAM, hard disk, and TCP/IP network interface (IP address and hostname). Hosts share neither disk space nor main memory with each other.
- Choose an example database. The tutorial procedure is the same for all of the example databases. The examples in this section use use the Stock Exchange Example Database. If you are using a different database, replace
stock with clickstream, credithistory, retail, or telecom in each example. - Log in to the database administrator account that was created by the installation script. The default account name is dbadmin.
- Copy your chosen example database directory to a directory on the Administration Host. Do not use the default data directory (
home/dbadmin). For example:The host on which the Vertica rpm package was manually installed. Always run the Administration Tools on this host if possible.
rpm is a powerful package manager, which can be used to build, install, query, verify, update, and erase individual software packages. A package consists of an archive of files and meta-data used to install and erase the archive files. The meta-data includes helper scripts, file attributes, and descriptive information about the package. Packages come in two varieties: binary packages, used to encapsulate software to be installed, and source packages, containing the source code and recipe necessary to produce binary packages.
$ mkdir /scratch/examples
$ cp -r /opt/vertica/doc/Stock_Schema /scratch/examples
- Set your current directory to the example database directory:
$ cd /scratch/examples/Stock_Schema
Do not change directory while following this tutorial. Some of the steps depend on it being set to the example database directory.
- Run the sample data generator program using the default parameters. The parameter names are listed in the README file.
$ ./stock_gen
Using default parameters
numfiles = 1
numfactrows = 5000000
numstockkeys = 273
numsplitkeys = 500
numtraderkeys = 200
random# = 20177
timefile = Time.txt
If the stock_gen executable file is not present or does not work correctly, recompile it. This example uses the GNU C++ compiler, which is a free download. You can use any other C++ compiler.
$ g++ stock_gen.cpp -o stock_gen
$ chmod +x stock_gen
|
If you are using VMware, the default 5M row fact table load will probably fail. Specify a smaller fact table size such as 1000000 (1M) rows as described in Generating Custom Data Files. The maximum size of a bulk load depends on the system resources and cannot be determined accurately.
- Run the Administration Tools.
$ /opt/vertica/bin/adminTools
A quick reference to the Administration Tools Keystrokes is available at the end of this document.
This is only a quick reference. It is not a complete guide to keystroke usage.
Return
|
Execute selected command.
|
Tab
|
Move cursor from OK to Cancel to Help to menu or form to OK...
|
Up/Down Arrow
|
Move cursor up and down in menu, form, or help file.
|
Space
|
Select item in list.
|
character
|
Select corresponding command from menu.
|
If you are using a remote terminal application such as PuTTY or a Cygwin bash shell, see Notes for Remote Terminal Users.
The appearance of the graphical interface depends on the color and font settings used by your terminal window. The screen captures in this document were made using the default color and font settings in a Cygwin Bash Shell running on Windows XP. If you are using a remote terminal application such as PuTTY or a Cygwin bash shell, make sure your window is at least:
81 characters wide and 23 characters high
If you are using PuTTY, you can make the Administration Tools look like the screen captures in this document:
- In the PuTTY Configuration dialog, create or load a saved session.
- Click Category: Window > Appearance.
- In the Font settings, click the Change... button.
- Select Font: Terminal Font Style: Regular Size: 10
- Click OK.
- Click Category: Session
- Click Save
Repeat these steps for each existing session that you use to run the Administration Tools.
- Accept the license agreement (once only).
- Specify the location of your license key file (once only).
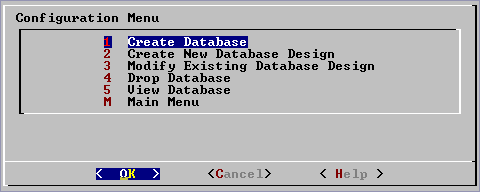
- Go to the Configuration menu and select Create Database.
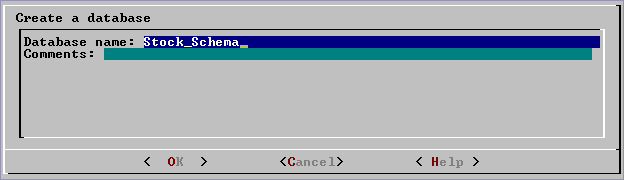
- Create a database named Stock_Schema.
- Do not specify a password.
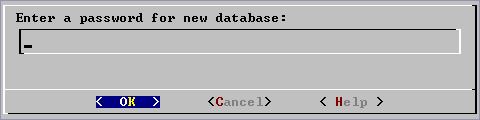
- Confirm that you do not want a password.
There is no need for a database superuser password in this tutorial. However, when you create a production database, always specify a superuser password. Otherwise, the database is permanently set to trust authentication (no passwords).
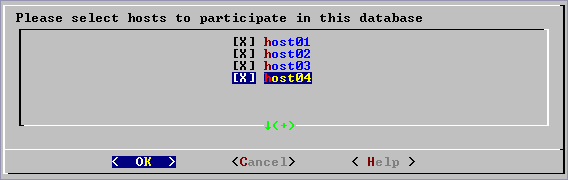
- Select the hosts that you want to include in the database cluster.
- Use the default pathnames for the data and catalog directories. Catalog and data pathnames must contain only alphanumeric characters and cannot have leading space characters. Failure to comply with these restrictions may result in database creation failure.
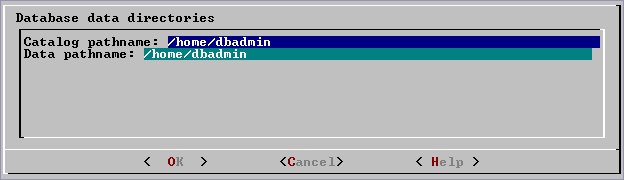
When you create a production database, you will probably specify other locations. See Prepare Disk Storage Locations in the Database Administrator's Guide for more information.
- Create the database.
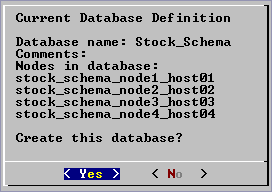
Vertica automatically creates a set of node definitions based on the database name and the names of the hosts you selected.
A node definition is a metadata object that binds a host to a database. A node definition contains a symbolic node name that is used to specify segmentation in projections.
Segmentation is the horizontal partitioning of a projection so that it can be stored on multiple nodes. The goal is to distribute physical data storage evenly across a database so that all nodes can participate in query execution. See also:

- Go back to the Main Menu and select Connect to Database.
Welcome to the vsql, Vertica_Database v2.1.GA interactive terminal.
Type: \h for help with SQL commands
\? for help with vsql commands
\g or terminate with semicolon to execute query
\q to quit
Stock_Schema=>
- Execute the SQL script stock_define_schema.sql using the \i meta-command in vsql. This creates the tables and referential integrity constraints that make up the logical schema.
A logical schema consists of a set of tables and referential integrity constraints in a Vertica database. The objects in the logical schema are visible to SQL users. The logical schema does not include projections, which make up the physical schema.
Referential integrity in Vertica consists of a set of constraints (logical schema objects) that define primary key and foreign key columns. In a star schema or snowflake schema:
- Each dimension table must have a PRIMARY KEY constraint.
- The fact table must contain columns that can be used to join the fact table to dimension tables.
- Fact table join columns must have FOREIGN KEY constraints in order to participate in pre-join projections.
- Outer join queries produce expected results only when the fact table join column used in the query does not have a FOREIGN KEY constraint.
In the relational model, a table (relation) is a set of data elements (values) organized into horizontal rows (tuples) and vertical columns. A table has a specified number of columns but can have any number of rows.
In Vertica, a table is a metadata-only entity referred to in queries. The physical representation of data is a projection.
vsql is the Vertica implementation of psql, a character-based, interactive, front-end that is part of PostgreSQL and used by other database management systems. It allows you to type in SQL statements and see the results. It also provides a number of meta-commands and various shell-like features to facilitate writing scripts and automating a wide variety of tasks.
Reads input from the file filename and executes it as though it had been typed on the keyboard.
Note: To see the lines on the screen as they are read, set the variable ECHO to all.
Stock_Schema=> \i stock_define_schema.sql
CREATE TABLE
ALTER TABLE

- Return to the Administration Tools (quit vsql).
Stock_Schema=> \q
- In the Configuration menu, select Create New Database Design.
- In the Select a database form, select Stock_Schema.
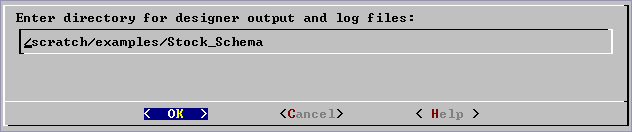
- In the Enter directory form, use the default pathname for output and log files.
- In the Database Designer form, use the default parameters.
.png)
A complete description of the Database Designer dialog is provided in the Database Administrator's Guide.
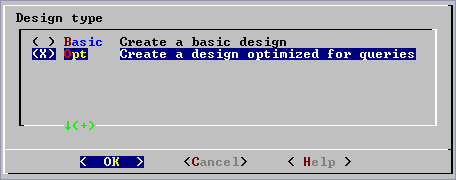
- In the Design type menu, select Opt - Create a design optimized for queries.
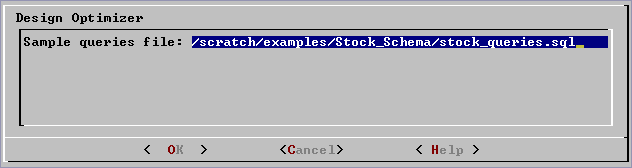
- In the Design Optimizer form, enter the pathname of the sample queries file.
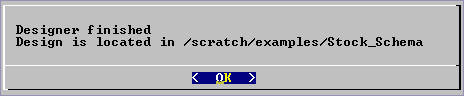
- The Database Designer prints status messages to the standard output while it is working. Several minutes may pass before the following success message appears.
 .
.
- Go back to the Main Menu and select Connect to Database.
Welcome to the vsql, Vertica_Database v2.1.GA interactive terminal.
Type: \h for help with SQL commands
\? for help with vsql commands
\g or terminate with semicolon to execute query
\q to quit
Stock_Schema=>
- Execute the SQL script generated by the Database Designer to create the projections that make up the physical schema.
A physical schema consists of a set of projections used to store data on disk. The projections in the physical schema are based on the objects in the Logical Schema.
A projection is a special case of a materialized view that provides physical storage for data. A projection can contain some or all of the columns of one or more tables. A projection that contains all of the columns of a table is called a superprojection. A projection that joins one or more tables is called a pre-join projection. Most projections are used for ad-hoc query processing and K-safety but it is possible to have query-specific projections.
A superprojection is a projection that contains every column of a table in the Logical Schema. A table can have multiple superprojections with different sort orders.
A materialized view is similar to a standard SQL view with one major exception: the data is actually stored on disk rather than computed each time the view is used in a query. A materialized view, then, must be refreshed whenever the data in the underlying tables is changed. A projection is a special case of a materialized view.
Stock_Schema=> \i Stock_Schema_design_opt_1.sql
CREATE PROJECTION
CREATE PROJECTION
mark_design_ksafe
----------------------
Marked design 1-safe
(1 row)
- Execute the SQL script stock_load_data.sql to load the example data.
Stock_Schema=> \i stock_load_data.sql
COPY
COPY
It may take several minutes to load the default five-million row fact table on a typical hardware cluster. You can watch the load by examining the vertica.log file as described in the Monitoring the Log Files section of the Database Administrator's Guide.
- Proceed to Running Simple Queries.


